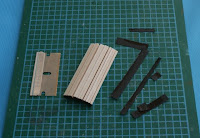
Start with a flat wooden deck slab upon which will be mounted the individual planks. If the deck is to eventually be curved, it might be best to wait until the deck slab is mounted in place and then add the planking. The planking must be done and sanded down before the bulwarks are mounted. Since our deck was only slightly curved, we mounted the planks while the deck was flat and then curved the finished deck assembly to mount onto the bulkheads.
For the 1/41 scale Virginia 1819 schooner, by Artesania Latina, we used 5/32 by 1/16 basswood about 2 inches in length ( approximately 4 mm by 1.5 mm by 50 mm ) which was thicker but narrower than the 5 mm by 0.6 mm strips included in the kit, but this gives more room to sand it down later. This made the caulked planks a scale width of about 7 inches and length of 7 feet. These are probably a little smaller than actual planks for the period, but they looked right to us. Still, if we were to do it over, we would go with 3/16 strips to give a more accurate scale 8 inch width planks. We chose to stagger the deck planks in a 1-2-4-3 sequence, again, because it looked right.
First cut the planks into the desired lengths.
Use charcoal construction paper for the caulking, as thin as you
Select a manageable set of planks, about 10 to 12, and set them on their 
The paper may be glued to the edge of the planks with superglue.
After this is dry, which will be seconds if you are using super glue, 
Planks will now have one paper edge and one paper end. 
Mark the sub-deck center line and then outline the center deck plank 
Glue the center plank to the deck. Then add the remainder of the 
All planks are mounted consistently with the paper to the front and to the 
Special care should be made to ensure that the stagger is consistent.
When dry, sand down the deck with rough sandpaper, then gradually 
When finished and sanded, the deck should look like this.
this.
We are still deciding if we will add some representation of treenails, which were used to fasten the planks to the bulkheads.


No comments:
Post a Comment